Showing posts with label T-Shirt. Show all posts

Monday, April 20, 2009

"You Got Queered, Doe" Tee


Yet another stencil t-shirt. This one was made for Stephen who coined the now famous "You got queered, doe".
Instructions on how to make these can be found on the "Don't Exist" post.
Holla.

Monday, August 11, 2008

The Beans Tee No. 2

This is the second in the series of, "The Beans" t-shirts to be made. Instructions on how to make this can be found on the "Don't Exist" post.

Monday, August 4, 2008

Unaffected Hipster Tee


Happy Birthday, Kubis!

Instructions on how to make this can be found on the "Don't Exist" post.

Tuesday, July 29, 2008

The Beans Tee No.1

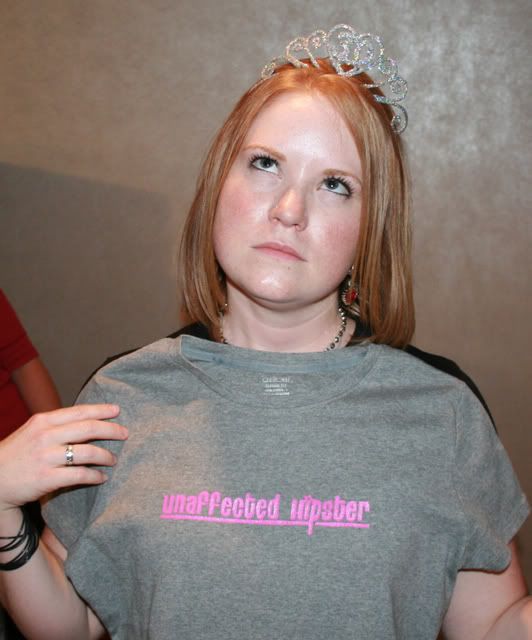
This is the first of a few, "The Beans" t-shirts to be made. It was made with an inverted stencil to give it a little more than usual, home-made feel. Instructions on how to make this can be found on the "Don't Exist" post.

Friday, July 25, 2008

"Don't Exist" T-Shirt


Our friend Emily is obsessed with the band, Beirut (she saw them 3-4 times in one week). While trolling Youtube for videos of her obsession, she watches a video that has a guy in the background is wearing a shirt that says "I Listen To Bands That Don't Even Exist Yet". Emily, as anyone would, thinks this is very clever and immediately makes this her Facebook status. I inquire, get this story and decide instantly that I need to make this shirt for her.

Shortly after putting this design together, it dawned on me to google it, as it obviously already exists, and found this design by Evan Ferstenfeld AKA FRICKINAWESOME. Sorry, Evan, I like mine better...

Materials Needed:
  • Stencil Design
  • Printer (Not Necessary)
  • Freezer Paper
  • T-Shirt
  • Fabric Paint
  • Foam Paint Brush
  • Exacto Knife
  • Iron
Instructions:
  1. If you've designed your stencil on a computer, you can try to print the image directly on a piece freezer, shiny side down, cut to 8.5 x 11. I was unable to get the freezer paper to feed through a printer, so I printed it on regular paper and traced the design on to the freezer paper.

  2. Next, cut out your stencil using an exacto knife over a cutting mat.

  3. Then iron your stencil on to the t-shirt. Make sure the shirt has been washed and is wrinkle free beforehand. Make sure your iron is set to the dry setting, go over the stencil once and wait for it to cool. Once it's cooled, go over it a second time and make sure all of your corners and edges are ironed down. Then iron a blank second piece of freezer paper on the opposite inside of the t-shirt to prevent bleed through when actually printing.

  4. Next you'll actually paint your shirt. Fabric paint can be found, but I used acrylic paint mixed with a fabric medium. Dab the paint on with a foam brush. Make your first coat fairly thin and wait for it to dry. Once it's dried you can paint on additional layers until you feel you have enough. Two should be enough.

  5. When the shirt has completely dried, carefully peel off the freezer paper. Lastly, you'll need to dry the t-shirt, inside out on low heat in order to heat set the paint.
Have fun!

Monday, April 21, 2008

Sasshole Kickball Jerseys

Materials Needed:
  • Stencil Design
  • Printer (Not Necessary)
  • Freezer Paper
  • T-Shirt
  • Fabric Paint
  • Exacto Knife
  • Iron
Instructions:
  1. If you've designed your stencil on a computer, you can try to print the image directly on a piece freezer, shiny side down, cut to 8.5 x 11. I was unable to get the freezer paper to feed through a printer, so I printed it on regular paper and traced the design on to the freezer paper.
  2. Next, cut out your stencil using an exacto knife over a cutting mat.
  3. Then iron your stencil on to the t-shirt. Make sure the shirt has been washed and is wrinkle free beforehand. Make sure your iron is set to the dry setting, go over the stencil once and wait for it to cool. Once it's cooled, go over it a second time and make sure all of your corners and edges are ironed down. Then iron a blank second piece of freezer paper on the opposite inside of the t-shirt to prevent bleed through when actually printing.
  4. Next you'll actually paint your shirt. Fabric paint can be found, but I used acrylic paint mixed with a fabric medium. Ideally, I would think you'd rather dab the paint on with a sponge. I used a roller and it seemed to bleed quite a bit. Make your first coat fairly thin and wait for it to dry. Once it's dried you can paint on additional layers until you feel you have enough.
  5. When you're done painting, carefully peel off the freezer paper. Lastly, you'll need to dry the t-shirt, inside out on low heat in order to heat set the paint.
Have fun!